Tuesday, July 24, 2012

A Wonky Finish

Most of my week was spent outside camping and finishing up the binding on my wonky blocks quilt.  I'm not entirely certain if I like the quilting I did on this quilt.  First it's hard to see what the quilting is, and second I'm not too happy with the way the variegated thread looks, I wonder if I should have gone with something solid that blended in... Oh well, I'm sure the little baby that this quilt is for will grow to like it (hahaha no pun intended :).  But before I show you the completed quilt I thought I would share a photo of my little hooligans...

Jordan and Payton
Yeah they actually look like that more often than not...  Anyhow here is that finished quilt!  Yeah  FINISH!


Here are some photo's of the back of the quilt... funny now that I see it in pictures I like it more hahaha.


Well that's about it, just a finish (I love typing that).  So onward and forward, time to focus some serious energy onto "The Big One" (see previous posts  http://quiltingcurve.blogspot.ca/2012/05/big-one.html and  http://quiltingcurve.blogspot.ca/2012/07/working-curve.html for details of this ambitious project for a novice)

I'm linking up to the Needle and Thread Network 

Tuesday, July 17, 2012

The Working Curve


Works in progress mostly this week.  I started quilting my wonky squares quilt, with an excessively complicated butterfly design.  This was the first time I actually marked the entire surface of the quilt.  I'm not entirely happy with how it's turning out but I think it may have something to do with how messy the top looks with all the lines drawn on it.  Here is a photo of the finished quilt top before marking.  I explained how I made this quilt in my post last week.  Any how onwards and forwards.  I'm missing my guild like only a quilter can.  I have so many things I would like to bounce off them!  My husband is as nice as they come but still a poor substitute for the ladies.  Gwen (a woman from my guild in Dawson Creek) gave me some 5" squares a couple months ago saying she didn't really have a plan for them and if I would use them I was welcome to them.  I totally jumped on the opportunity like any good vulture and squirreled them away with thoughts of a disappearing nine-patch brewing in my flighty little mind.  Well I saw my opportunity and went for it.  The photos are not that good (my camera is one of those indestructible ones that mostly takes utilitarian photos, since I literally break everything).   But you get the idea here.


All of the squres that Gwen gave me were of a bright baltic nature. So I paired them with a straight black and, ta-da, instant coolness. I love how it looks a complete mess. The great thing about doing this type of disappearing nine-patch is that even if none of the seams really line up it doesn't really matter. I did however read in the last while that some quilters always iron their seams open. I decided to give this a try... Although I haven't quilted this yet I can tell that, bar the wrinkles in the photo, the quilt does lay flatter. Is this worth the pain of pressing the seams open, and watching that they don't fold EVERY TIME YOU SEW ANOTHER SEAM?!? I'm not too sure. If I may pose a question to anyone reading this: Do you iron your seams open? Why? Any suggestions for a quilting design?

I have also decided to start working on 'The Big One' (dun dun dun) again. Here is a link to the first post of this ridiculous, "eyes too big for my plate" project http://www.quiltingcurve.blogspot.ca/2012/05/big-one.html. Due to our moving across the damn country (well two provinces over), I had to restart drawing the background. I'm happy redoing this though because I feel that I have learned so much more about quilting in the last couple months that a restart was needed (not boding well for a couple months down the road is it?). Anyhow I approached the project with fresh eyes, and new bigger, better ideas! Oh crap I'm so in over my head... Anyhow the idea is to have a Heron standing in water surrounded by water grass and dragonflys, with the glorious sunset behind it. Not too original but a pretty picture no less. Step one: build background out of freezer paper.


So here I am in all my glorious 'I've been at home for three days' wardrobe. I had to tape the freezer paper together to get the size I need this darn thing to be. Yes, I realize this is industrial freezer paper, but my town hardly has 5,000 people and this stuff was hard enough to find. Anyhow, here is a close up so you can see how small and frustrating these pieces are going to be. Oh well, as Willy Wonka once said, 'Little surprises everywhere but nothing dangerous".

The next design hurdle I have to jump through would be the Heron. A bird of awesome grace and hilarious gawkiness, I'm going for grace...
After hours of forcing my control- impaired hands to draw, I came to this final design for the Heron... Yes, there is a body and legs but I like the head best.
Which finally brings me to the end of my current progress. I told my lovely husband as much when he arrived home from an excessively long day at his new job... He replied that he thought that the whole thing was going to be too busy and I should just put the heron, grass, and dragon flies in silhouette. Well, why didn't I think of that? Oh yeah, because Mom (for whom the quilt is for) wanted it to be in colour. I promptly called mom and told her my husband's smart-ass idea. She responded with a irritatingly open-mind saying "That might be nice". So anyhow, I haven't dropped the idea of having a full colour, detail-rich Heron, but I thought I would ask for your opinions on the matter? I will continue to build the background and post photos when it's done, but what do you think? Colour or Silhouette?


Linking up for the first time ever since I just figured out how to do this... I hope

http://needleandthreadnetwork.blogspot.ca/


Sunday, July 8, 2012

Endless Skies


The land of endless skies has eaten my family.  We all finally arrived safe and sound in Saskatchewan and things are finally settling down into a normal life again.  I was disappointed to learn that the guild in town doesn't meet up during the summer.  I have more poking around to do but at this moment I'm one lonely quilter.   I bought fabric for yet another baby quilt.  I drew up a pattern on my trusty graph paper trying to see if I could build a wonky blocks type quilt.  Here are the plans I drew up.  Its hard to see in the photo but
basically nothing lines up.  I used each little square on the paper like it equals 3 inches then I broke up the area of the quilt into squares in the multiple of 3's, then added half and inch to the finished block for seam allowance.  Here is my breakdown:

Blue (17) - 3 1/2 x 3 1/2
Purple (6) - 3 1/2 x 6 1/2
Yellow (7) - 6 1/2 x 6 1/2
Dk Green (1) - 6 1/2 x 9 1/2
Red (9) - 9 1/2 x 9 1/2
Lt Green (6) - 12 1/2 x 12 1/2
Orange (4) - 15 1/2 x 15 1/2

Center Black Squares (33) 2 1/2 x 2 1/2
Center Black Squares for Blue (17) 2 1/4 x 2 1/4

Easy right!?! Nope not that easy....
I honestly don't mind drawing up patterns and seeing if I could make something like this work, remember I'm new to this whole thing and I'm still training my brain to think like a proper quilter (Ooooh I want to make one of those...).  Anyhow the hardest part for me was figuring out how to make such a complicated quilt with the limited amount of fabric I had.  Black center of the block easy, but otherwise I had only 6 other patterns to work with.  Well there is nothing to be done about it because like heck you can get me to go and buy more fabric (I panic when I enter a fabric store... it's a wonder I actually bought this stuff).  Well whatever I decided just to jump into it and get 'er done.  Well to save myself from an embarrassing amount of swear words at this point of my post I'll just let you know that as deceptively simple as thus quilt may appear it's not.  Here is how I made the blocks.  First I cut 2 1/2 inch
step 1 
step 2
step 3 
step 4 

strips from my selected fabric, then I sewed the black square to the strip, I used a pair of scissors to cut the piece off to from step one.  Sew another piece onto the other side, iron.  Sew the remaining two sides of the black square.  Now depending on the estimated size of the finished block the size of    the strips may change.  For this project I used a combination of 2 1/2 inch strips and 3 1/2 in strips.  Because once you get a finished square in step 4 it measures approx. 6 1/2 inches square, and now it's time to make the square wonky.  I highly recommend having a 'square up' type ruler for this project.

I needed to cut this square down to a 3 1/2 inch block so I layed the ruler on top, tried to center the ruler as best I could and slice and dice.  This is super fun but a little tricky.  Make sure you check your lines TWICE... yes that quilting curve totally caused some colourful words to exit my mouth.  Turn the block line up your ruler and cut again and tada you got yourself a wicked cool wonky block.  Once you have this cool block it's time to start sewing on the next strip set to give the block a little more depth.  I did


 eventually figure out a faster way to chain piece and assembly line this quilt but unless one was to sit down and plan a lot more (or if you have a huge array of fabrics) it's hard to make this quilt go together quickly.  I was also slightly appalled at how much fabric was wasted (especially the first couple blocks).  But I was able to salvage much of the waste to make the smaller blocks.  Make the big blocks first, and use the scraps to make the smaller ones.  Again because of my limited number of prints my design wall played a huge roll in putting this thing together.

I laid out the quilt on the design wall and proceeded to sew the pieces together that I could, and ended up with this.  Now I knew that I was going to have to do some fancy planning to put the whole thing together but I remember looking as this so happy at how far I had come when I got stumped.  In theory I knew all I had to do was leave a 1/4 in open and put it all together... well but... huh?  I went and had a beer on my back deck and pondered my troubles.  Although it is that simple I found that you want to do things in a certain order otherwise your seams don't lie flat or your will end up with holes.  Well after a little fortification I was able to figure it out but I also found that 1/4 inch wasn't enough space for me I ended up leaving about 1/2 and inch and it was much easier.  Anyhow the top is finished and I have already started on another project.  I haven't decided exactly how I'm going to quilt this wonky blocks quilt but I'm sure it will come to me at 2 am one of these nights.
Pretty cool eh?


Friday, June 1, 2012

Feature Friday


Are two really better than one?  Well my friend is going to let me know when her twin boys are born later this summer.  As I've mentioned in previous posts I'm moving to Saskatchewan at the end of June so I've been working on a couple of cute quilts for those precious little boys that are bound to drive her crazy one day soon.  I did up a very simple block, I'm really not sure what it's called but I know that it does the job.  I actually learned a lot about colour on this quilt.  Originally I was going to have those bright red diamonds be a pastel blue, but as stated by one of the wonderful ladies at my guild 'where is the pop?'.  She I just happened to have some red kicking around so POP!  Obviously there are going to be twins so I had to make a second quilt.  There are a couple of sets of twins in my family and I didn't want to make the quilts the same... but I couldn't resist, so basically where there is green on one there is yellow on the other.  A big department store is going out of business here in Dawson Creek, and there were a bunch of those super soft micro fiber blankets for sale so they are super soft on the back.  Obviously I decided to just give these blankets a quick stipple.  I'm still in the process of stitching down the boarder of the second quilt.

Otherwise with so many babies coming up this summer I have also finished another Care Bear quilt for a hypothetical baby girl my friend may be having (I really hope it's a girl because I don't have a little boy back-up quilt).

I've been working through my 'stash' like a demon.  I suppose it's really not that hard when all my stash consists of is mostly hand-me-downs from other quilters.  But I'm loving working with fabric I wouldn't choose for myself because it forces those creative juices... Although pumping out simple baby quilts is not exactly my idea of a stroke of genius at least it keeps me happy :)


On another really more important note I have titled this post Feature Friday because I have been given the honor of being the quilter selected to guest post for the Feature on The Needle and Thread Network.  Basically the network is a common link up page for Canadian fiber artists.  It's a wonderful site run by truly patient people (yes patient, I don't communicate good sometimes :).  Anyhow here is the link to my feature     http://needleandthreadnetwork.blogspot.ca/   


I plan to post again soon, but life keeps throwing curve balls at me.  Nothing serious, just some day surgery for my eldest daughter and appointments coming out my butt, tiring to get it all done before the move from Northern British Columbia to Central Saskatchewan.  I find life so interesting that way eh, one day you can be peaceful and calm ready for the day and....BOOM!!! This, that, and the next thing are all needing attention right now!  Oh well, I suppose your not a procrastinator until it smacks you in the face eh!  Well make sure to check out The Needle and Thread Network.
http://needleandthreadnetwork.blogspot.ca/p/welcome.html

Wednesday, May 23, 2012

The Big One

the big one
So all along my quilting journey my mother and father have been extremely enthusiastic.  They bought me my first machine and have been supplying me with a regular stream of doodads (Yay for Christmas Accuquilt Go Baby).  So it only makes sense in the deep of winter I brought up the idea that I was ready to tackle a large quilt (all my quilts are no larger than lap size), and perhaps my parents should be the recipients of such quilt.  Well the brainstorming was on... Unfortunately my parents are afflicted with the most common form of marital distress, they clash.  Basically to no one's surprise we went with mom's idea.  The idea is to have a lake setting with hills in the background and a spectacular sunset, then a Heron standing in the shallows surrounded by water grasses, and some dragonflys to make dad happy.  Sounds great eh?  Sure on paper!!! What the heck was I thinking!  I can cut out some cool shapes (go Accuquilt, thanks dad), but a Heron?  Everyone has seen the amazing bird quilts out there (google 'heron quilt') but is it actually possible to construct one?  It seemed like a good idea at the time.  Well with a four hour drive home it started to really sink in what I was promising, heck mom even took me to the fabric store in Prince George and invested in some fabric... I told her at the time that it may take a year or so, but it's now been almost 6 months so you can probably feel my panic through the computer screen.  Well as the weeks past I started to talk my family and friends crazy with ideas on how I could possibly make this work.  A lot of research, a lot of 'have you tried this', and some seriously good advice I constructed my first mini prototype.  Boy did I make a lot of mistakes, but it showed me that this is not a pipe dream I can make this work.  With that in mind I set to work on a second prototype.  Here are the basic steps I took to make my little practice quilt (which at this moment is not entirely finished.

template, note to self; use more dash mark things
Step One: Sketch and transfer to freezer paper. 


One really important thing I learned was to have a reference sketch especially when I started having more than ten pieces, it's hard to remember where all those little bits go.  I will also make a point to have more of those little dashes to help place the pieces more accurately.  Also I will mark the top of the piece with little arrows or something along those lines, so I know which way is up and what edge to fold over for the seam.


before I ironed the TOP edges under
Step Two:  Cut out freezer paper bits, iron onto the right side of the fabric.  Cut out with a generous 1/4 inch seam allowance.  Iron under seam allowance.

The seam allowance allows you to fold the raw edge under the freezer paper, I learned that it is only necessary to fold the top edge of the fabric under.  When your placing your pieces together later layer from the top down.

I used a large iron to iron my first prototype, and it worked just fine for the moment, but I did 'invest' in one of those little ones, I think it was a good purchase.  I obviously plan on doing one more quilt like this so why not buy more stuff to move to Saskatchewan in 6 weeks?   But honestly I really like the little iron, and it really made a difference in the amount of swearing I was doing.

The other and possibly most important tool here was starch.  I bought the aerosol spray stuff (I bought it at a regular drug store), sprayed it into a small dish and applied it to the edge with a kids old paint brush.

Also remember to snip the edges of the concave curves to achieve that flawless edge.

all the bits are lined up and ready to iron down

Step Three: Arrange bits into their correct spots lining up the little dash marks.  Iron them paper up onto a piece of one sided stabilizer.

Once I had all the individual pieces prepped I lined them up face up on a piece of stabilizer stuff.  I used the stuff that people put in shirt collars, it's important that you use something that is not going to make a quilt too stiff and has only one side of adhesive.  Once lined up I ironed the whole thing and am ready to pull off the paper.  I need to take more time and line up those ever important dash lines.

Step Four: Remove Paper!
water
land
sky

Step Five: Using invisible thread stitch down all the seams.

Much easier said than done eh! I was a little horrified how many seams there were and how much you would see my back stitch if I had to stop half way across the quilt (why do I never think of these things before I run along and do it)?  Anyhow here is a little photo of what the back looked like after stitching it all down.


Step Six: Baste quilt and quilt it!

The top looks just fine and a lot better after I started quilting it.  Here is a photo of how far I have gotten with the quilting so far, I'm not sure if I will ever finish this little quilt I just wanted to test an idea and try some thread painting (the grass at the edge of the water).   I feel I have learned what I wanted and now I can move on.  I'm sorry for the lack of really informative photos, I never did plan to post this but I was just so happy to figure out a great way to tackle this ginormous project I had to share.  But I have decided that after I move to Saskatchewan in June I will tackle 'The Big One' and I will take tones of photos and share a more in depth 'how it's made' with everyone.  Whew I feel as though I'm turning up the heat and I'm only semi prepared for it but I suppose you never succeed until you try.  I suppose one could say it's never finished until it's done too... hmmm maybe I should finish this...


Friday, May 11, 2012

Hoot a Day

Hoot a Day
Well as the week has past panic is setting in as the reality of moving my family two provinces over (British Columbia to Saskatchewan) becomes a reality.  I'm extrememy concerned about my becoming frustrated by the lack of comfortable scenery.  I plan to keep an open mind because I'm sure the flatland holds the same amount of charm as glorious, huge, enchanting mountains do...  Oh crap I'm so in trouble.

Anyhow there has been a frantic rush to finish all my projects that are going to people here in British Columbia.  One of my  friends here in town had the audacity to have twins and double my work (perhaps I should just be thankful it wasn't me hahaha).  I also took on a commissioned baby quilt for a lady, it was a very simple project, yet it was very hard trying to figure out what my time was worth and how much does someone pay for a baby quilt? So here is a breakdown of what I did:

  • Sewed boarder onto panel. 
  • Attached label to front via decorative stitch.
  • Basted quilt (had to buy different batting $12).
  • Quilted  quilt (32' x 45' approx) with simple design (4-5 hours), had to buy thread ($3).
  • Made and attached binding, hand sewing it down (3-4 hours).


                                                                           All in all it really wasn't a big deal and it was good practice, and I would have done it for free if I had known her.  Talking to some people (my mom of course) I came to the conclusion that if I short change myself now with my quilting I always will.  So the price I completed this project for was.... $75.00.  It was tough to ask for that much money but I felt confident in my workmanship.  The exchange went off without a hitch and I'm pretty happy about the whole affair.


Saturday, May 5, 2012

Pretty in Purple


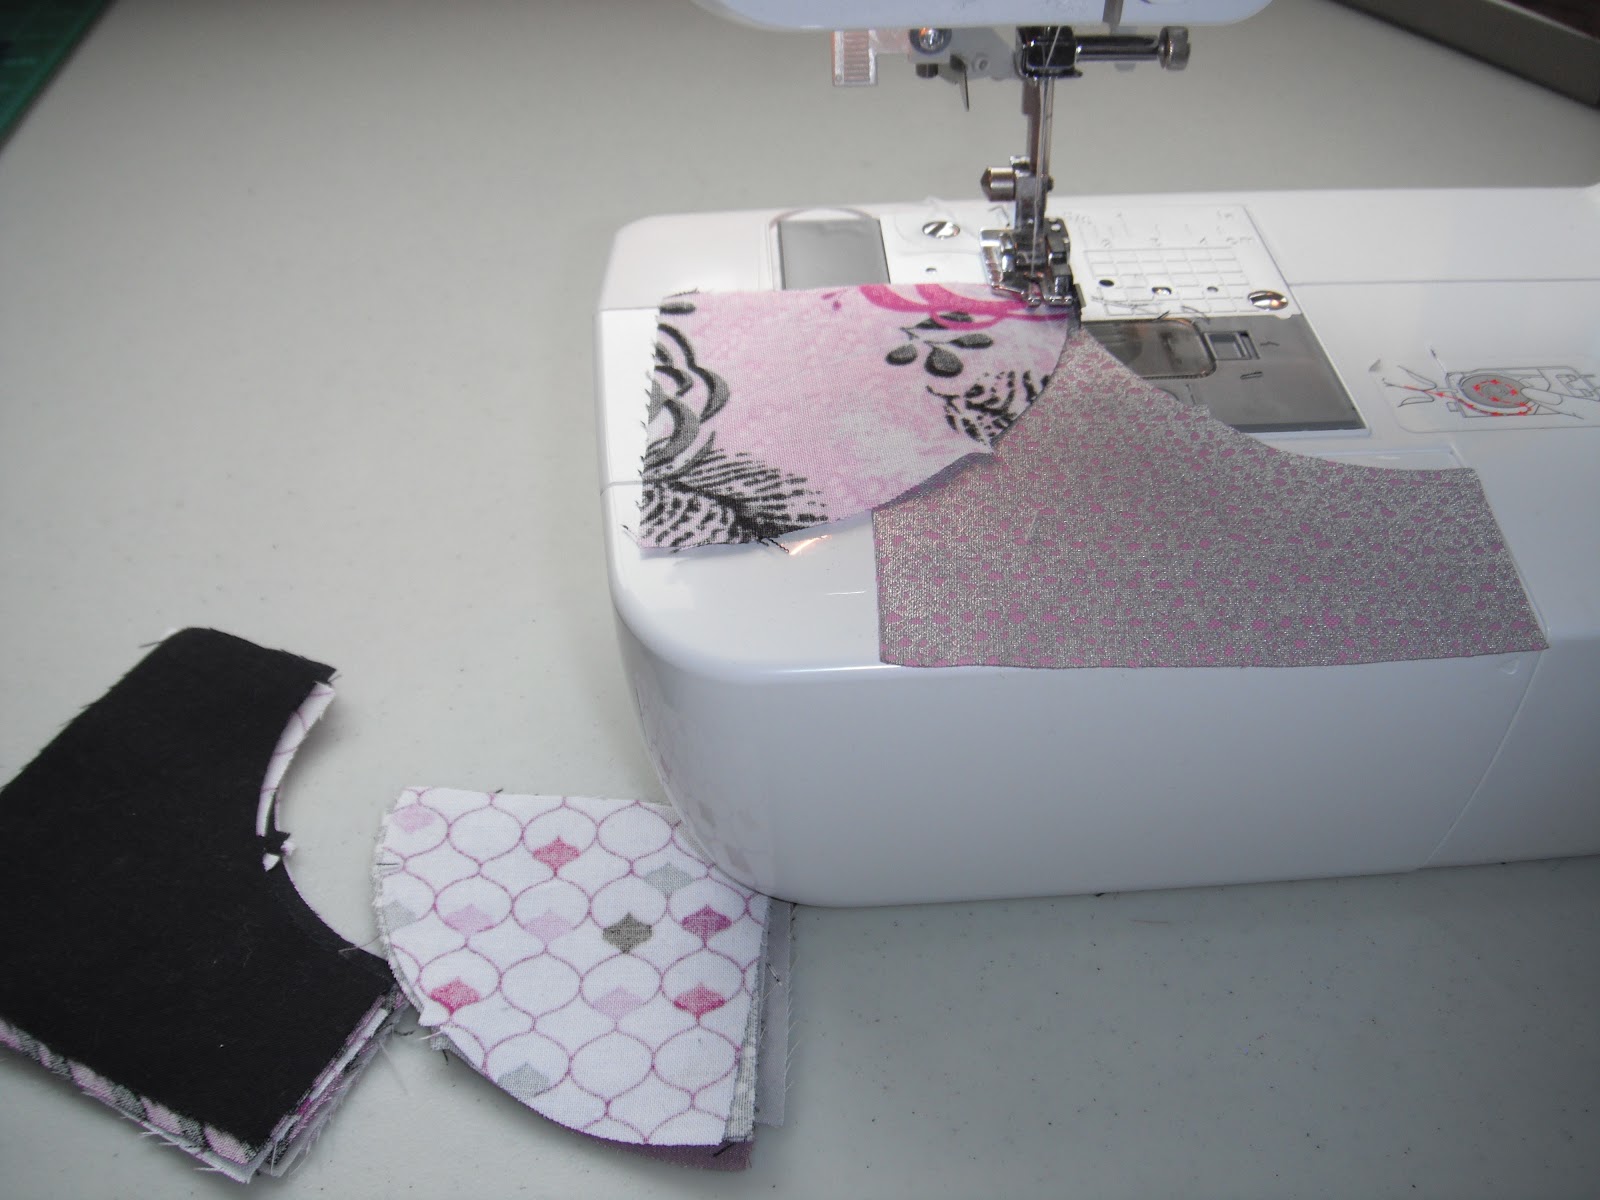
I've had a full couple of weeks, mostly just a wrenching decision to move my little hooligan family to Saskatchewan?!? Yeah, it's still to be determined. But anyhow with a long, long, long drive to Saskatchewan looming, my sweet husband recommended that I make a quilt for his cousin who would be watching the kids in Edmonton for the 4 days. Well of course to any normal person this seemed like a great idea... until I became over confident, over ambitious, and completely out to lunch, since the deadline was a mere 5 days away. So like a crazy person I dropped all other activities and family affairs (dishes, dinner, laundry etc...), and set to a long quilt-a-thon. The only thing that saved this doomed project was my Baby Accuquilt cutter. Honestly I just received the drunkards path template in the mail the day before and figured I could whip one of those together in no time Haha...ha. Honestly, the reason why I put this photo of my machine with the pieces on it is to give you an idea of the itty-bitty pieces they really are. I swear, by the time I had all those little blocks sewn together I was walking in a curved line. It was finally time to put the pieces up on the wall and figure out what type of placement I wanted them to be in... This one did not pass.


I ultimately went for the scatterbrained placement, since that was the way I was feeling. So basically the construction of the quilt went; Bits to pieces, pieces to clumps, clumps to strips, and finally strips to an embarrassingly tiny quilt top. Honestly my greatest downfall is size estimation... or A.D.D., I'm a little torn on the issue. Anyhow all negativity aside (and some purple and black borders) you get what you get in a two day period. Funny that feeling of accomplishment that we feel when we finish a quilt top, we all know deep down inside that your only half way done, but conveniently we feel that a major sense of accomplishment... All self-deprecating aside (it's a stormy day outside and it seems to be affecting my mood, my apologies), I hopped right to it and continued the manic race to quilting triumph. Day 4 saw the real crazy in me come out, you could view it as an exercise in poor parenting, or a lesson in independence. I quilted this little 70's porn quilt in a design similar to Leah Day's H2O design ( http://freemotionquilting.blogspot.ca/2010/05/day-181-h2o.html). Well I didn't actually watch her video I just jumped in and figured it looked simple so I should just breeze through this and call 'er good... how typical. I can not stress enough the advice to just slow your ass down and plan, plan, plan. I mean, obviously it worked out, but it didn't need to be that hard.  So anyhow I survived the race to the end and spent 17 hours in the car sewing the binding.  Anyhow I plan to post again soon and sorry for the delay(go life go).  But before I sign out I have received the Liebster Award from Tessa at TheSewingChick.blogspot.com and Mike at amateurquilter.blogspot.com.  Thank you both so much and everyone else out there for their kind and supportive words of encouragement.   

"Liebster" means "dearest" or "favorite" in German.  As a recipient you are expected to:  
  • Thank the person that nominated you and link back to them 
  • Present the award to five other blogs under 200 followers
  • Let them know by commenting on their blog
  • Post the award on your blog

I nominate the following for the award.

Mary @
http://www.maryslatenightstitchn.blogspot.ca/
Ashileigh and Julie @
http://heritage-keepsakes.blogspot.ca/
Candice @
http://quiltdesignsbycandace.blogspot.ca/
Linda @
http://bumbleknit.blogspot.ca/2012/05/whats-happening-wednesday.html
Unknown Name @
http://round22.blogspot.ca/2012/04/just-final-post-of-april-with-quilt-i.html

On a final personal note, I didn't win anything at the quilt show :( but wow for the quilts that did they were so amazing they had to be recognized.  Here is the finished photo of this 70's porn quilt.