Thursday, April 11, 2013

A Valued Skill

"It's an old quilt, but it was made by her mother.
She just wants to be able to snuggle under it again".
Quilting is a skill.  A skill I'm proud to show off and use to the best of my ability.  My skill is gaining momentum and I admire and sometimes idolize other quilters around me (and in the online community).  I feel as though my skill has substance and value... Until someone mentions $100.  I'm a sucker!  I'm broke, nothing outrageous just the normal young family trying to get by.  But does that give me the right to de-value my (and maybe even your) skills?

So to the point here.  Through a confusing turn of events I ended up agreeing to put a new back on an old quilt and give it a 'quick stipple'.  I didn't get a look at the quilt before I agreed to do it, to a predetermined price of $100.


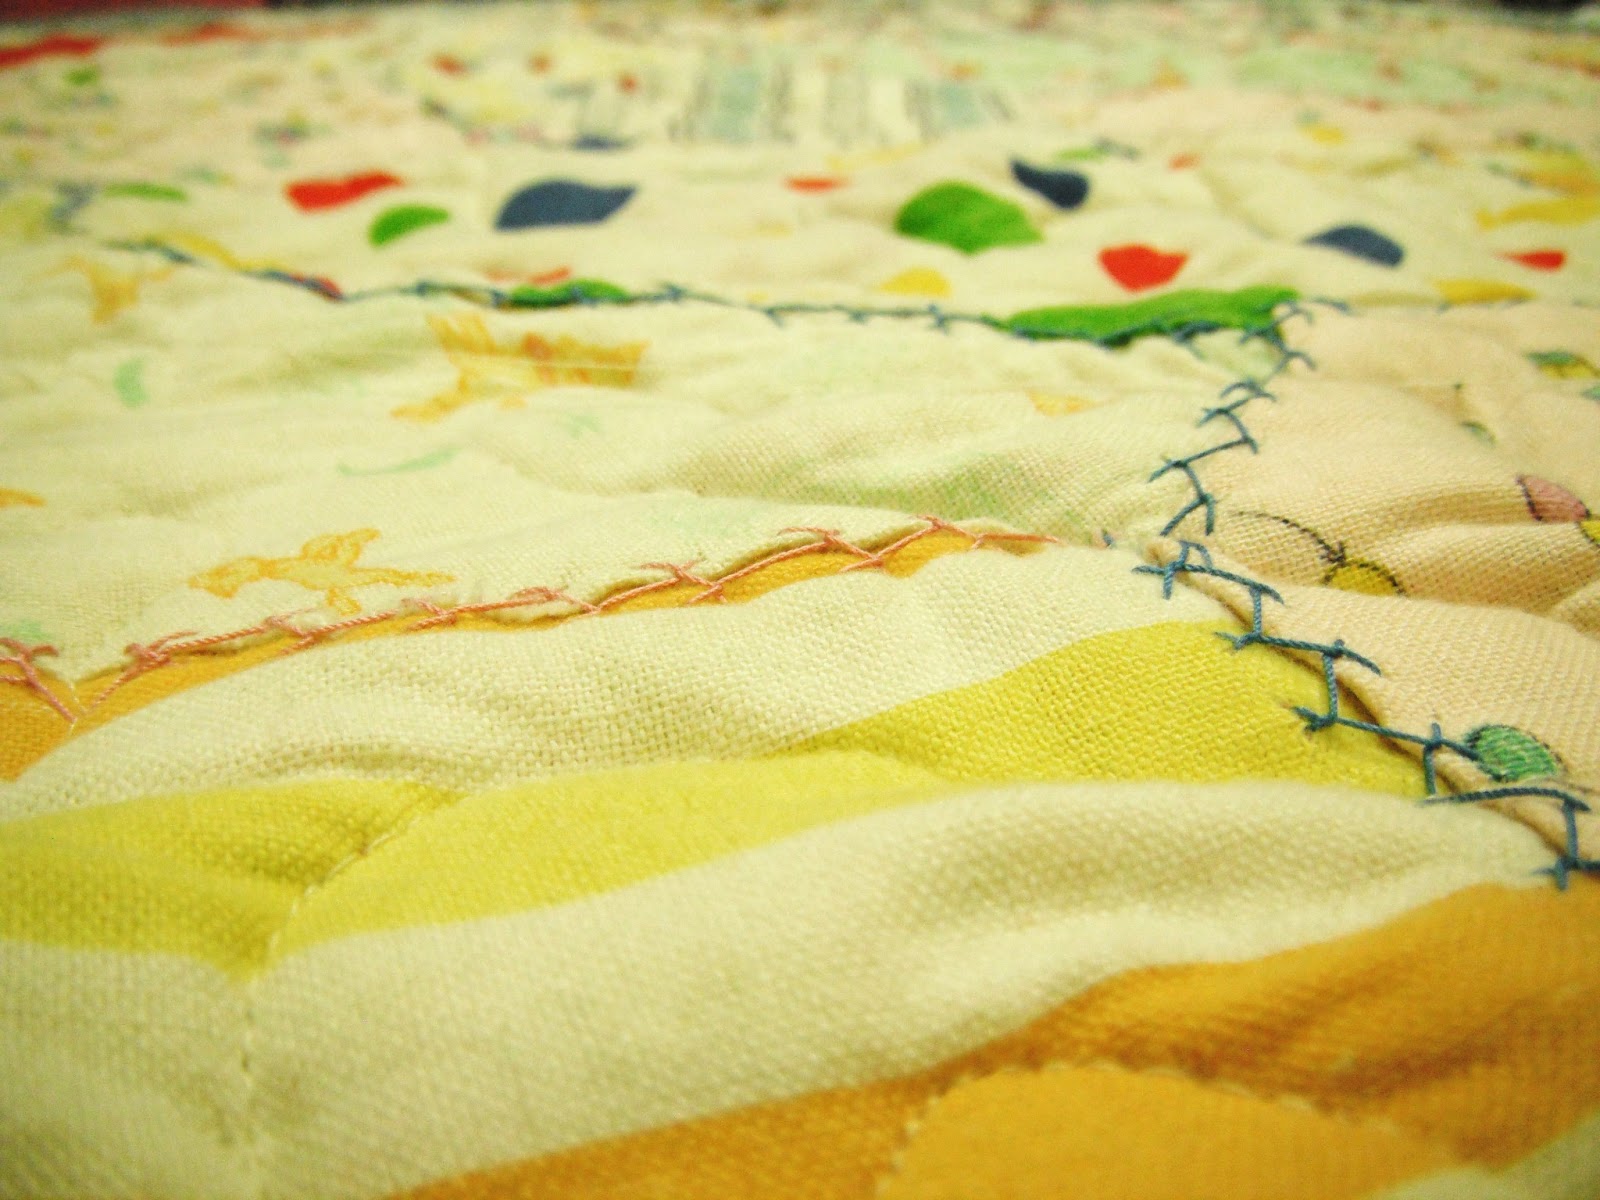
I wasn't able to quilt the quilt at my home because the owner of the quilt is massively allergic to cats so I had to wait for a Hall Day.  I arrived ready to tackle this 'quick stipple' and found to my horror a lumpy, thread bare, sheep skin stuffed, burst seam, mess of fabric some people would call a quilt.

I can see the love in the quilt though, the stitching is beautiful, original crazy patchwork.  But note right under the green spot, that is thread bare.  So much of the quilt is falling apart, I can't just give this quilt a 'quick stipple' and expect it to hold together, never mind be useful.
Burst seams run rampant, 1 in 5 are burst and need to be fixed. 

So what am I to do?  I know what needs to be done, it needs the sheepskin batting removed, new batting bought, the seams should be meticulously hand sewn together, replacing those patches that are too far gone.

You can imagine my standing there looking at this quilt thinking to myself how much I just want to whack it apart and make a couple throw pillows she could snuggle with instead.   But I can't.  I also can't hand sew those seams together, replace the batting, or replace the worn patches, quilt and bind it for $100.  I also can not just leave it.

So what do I do you ask?  Well I pin the new backing on it and quilt it.  I fix every little seam while I free motion the quilt.  It is not the most tidy job, and I want to just accidentally rip it in half.  Instead I push through and get it done.   Remember those pretty hand stitches, yeah until they catch on your darning foot... every darn time you get close to one!  Ever sew through sheep skin batting... not much fun. Needless to say I was sweating 15 minutes into the project.

I spent 6 hours on the quilt.  I'm over half way done, but I estimate another 6 hours are needed.

$100 divided by 12 hours = $8.30/hour.  Sad but true, my valued skill adds up to under minimum wage.  This is not the first time I have undervalued myself.  I truly hope I have learned my lesson.
My 'Quick Stipple' 


I will be sending a note with this quilt explaining how difficult it was and how lucky she is that I had a soft heart.  I will also request more money for my difficulty if she can.  Also that if she even thinks about washing this quilt again it may disappear into nothing.


Wednesday, April 3, 2013

Cats, Chairs, Chaos

So we moved into our home in the early fall of 2012.  Because we moved inter-provincially we sold most of our big furniture before leaving and have replaced said furniture with cheap non permanent stuff to get us through the renovation (or complete destruction depending on how you look at it) of the entire house.  This includes these $10 plastic covered folding dining chairs (which match perfectly with the folding plastic table).  I'm really not too worried about ambiance these days but after the kittens (smack self in head) I had to start repairing their midnight romps.  


One piece of tape really isn't too bad, but are you seeing this!  The cats are INSANE!!! I may have picked a poor winter to house kittens indoors...  Anyhow over Easter weekend I just couldn't stand the sight any longer (avoidance of the kitchen is detrimental to a happy marriage and the nourishment of children, or so I'm told).  So I grabbed an old sheet, some leftover batting, a stapler, a screwdriver, some scissors and a beverage.

Step 1: Unscrew cheap particle board cushion bases from metal frame.

Step 2: Tear off destroyed kitten saliva soaked mass of plastic and other unidentifiable material from cushion base.

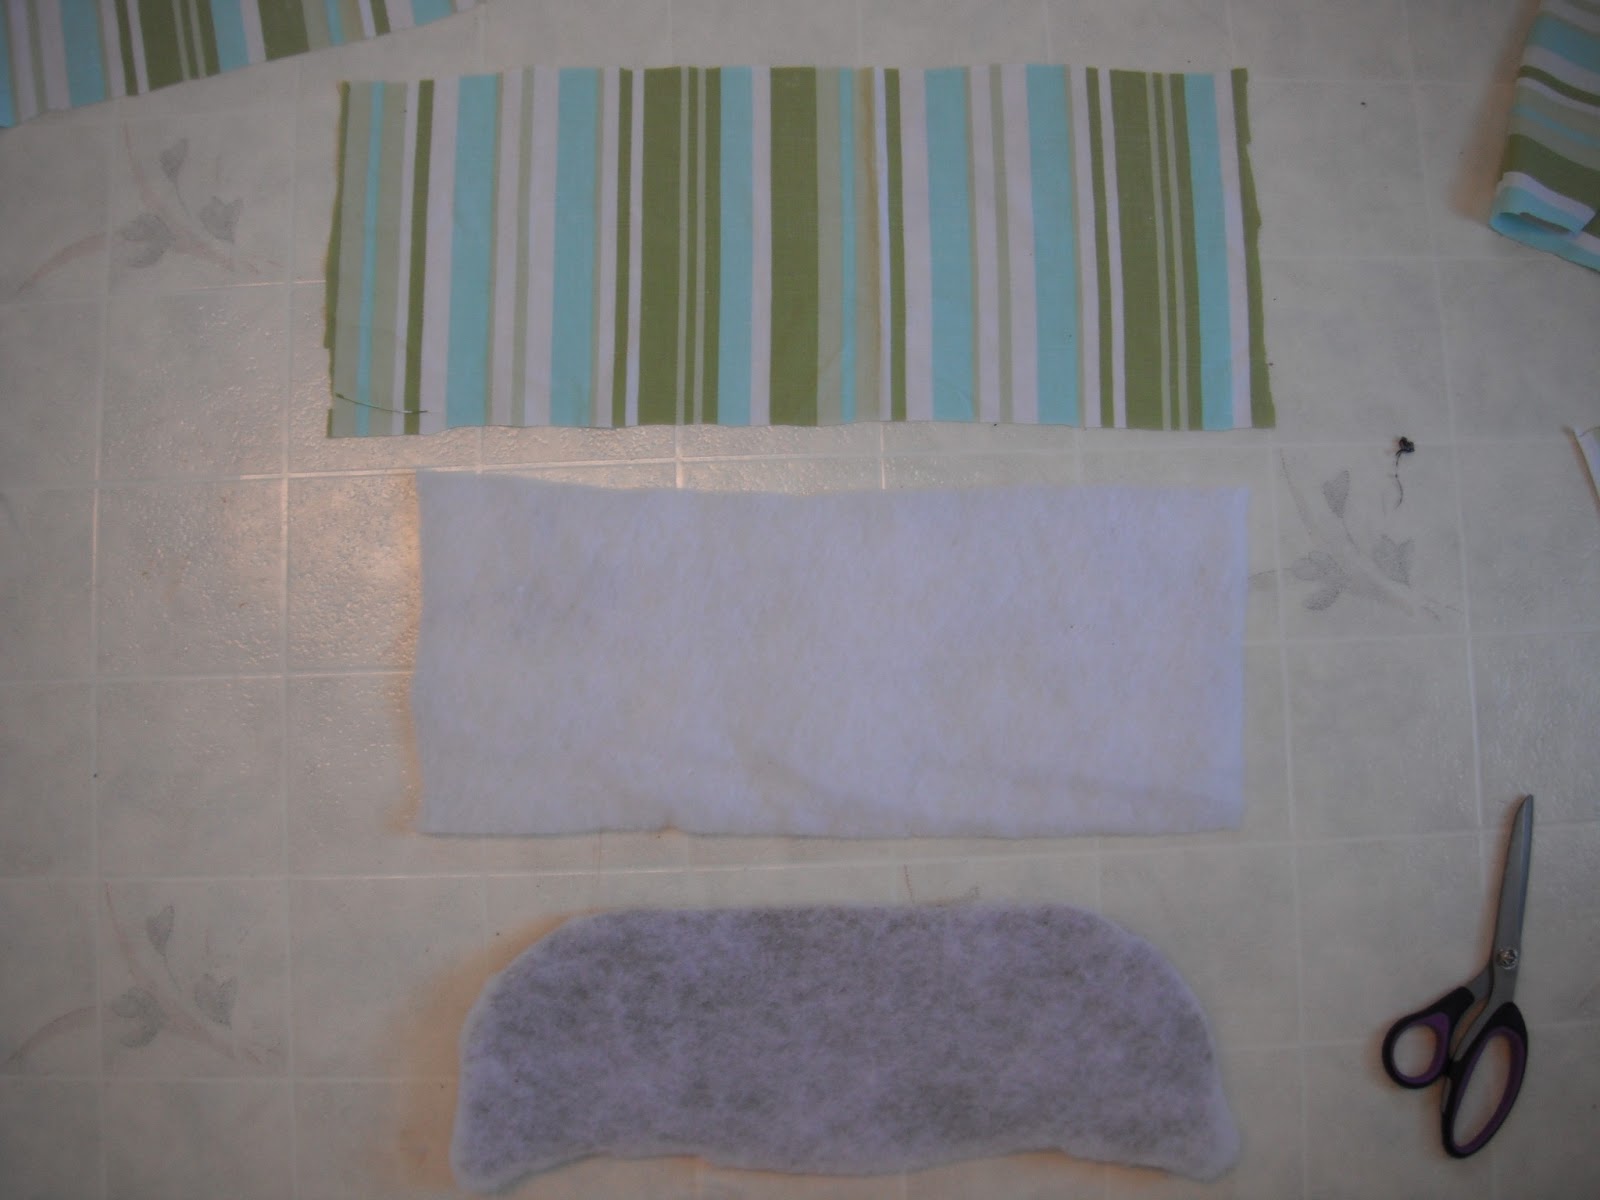
Step 3: Cut perfectly shaped batting to fit cushion base

Step 4: Give up on step three, and rough cut the rest

Step 5: Make another beverage

Step 6: Cut another layer of rectangle pieces of batting to wrap around cushion base

Step 7: Cut fabric in shape large enough to wrap around cushion base

Step 8: Gather all misplaced tools/materials, yell at husband for another beverage, scold children  try and not swear too much at kittens.

Step 9: Layer 2 pieces of batting and one piece of fabric onto cushion base.

Step 10: On back of cushion base stretch fabric firmly and staple into place, continue stapling around entire cushion base, pulling gently but firmly.

Step 11: Try not to staple self, lay off the beverage.

Step 12: Re-screw new beautiful cushions onto metal chair bases.

Step 13: Sit on pretty chair, use thick foam next time.


Notice I got the stripes wrong on the 2nd one in?  Not a bad afternoon.  If anyone is interested in doing this for themselves I would recommend maybe Googling it first, and making sure you have the correct materials on hand before you start LOL.  The funniest part is I made spaghetti for dinner and made the family eat in the living room so they wouldn't get sauce on my nice new chairs... so I'm still avoiding the kitchen.

I'm linking up to The Needle and Thread Network, a great place for Canadian fiber artists... My weekend project may not be art but it's funny.


Tuesday, March 19, 2013

Behind

I'm so far behind in my blogging, if you could just press your face to the computer screen maybe you could catch the jist of my procrastination without my typing it... No? Fine well here it is then.


I received Michelle's 'fuglies' in the mail from her giveaway a couple of weeks ago.  Michelle is a creative improv quilter who I blogs over at From Head to Fabric.  Thanks again Michelle, I'll put them to good use.

Whew, I know it's cliche to type about the weather but comon, I can not believe how much I despise winter right now.  I know the whole country is gritting their teeth trying not to kill each other, and I thought I would congratulate everyone on this accomplishment.


This little one is part of a rather large herd of deer eating all the trees in town right now.  I chit chat with this little guy pretty much every day that I quilt.  My kids spend most of their outside time building deer traps, apparently my cooking has been sub par lately and they figure that deer would be the best alternative.  I'm fairly impressed with their ingenuity but alas no deer roast yet.

I have been working like crazy on my studio and an ever growing pile of commission quilts.  But I'm trying to make my studio #1

Here is a sample of my mudding and taping.  I have a fairly entertaining article over at my renovation blog, Renovation 800.  Anyhow that's pretty much all I can post about quilting wise since the majority of my quilting projects are either bundled in a corner, secrets, or in drafting stage.
A little note to all the wonderful artists over at the Needle and Thread Network: I have been busy but reading all of your posts, and enjoying your creativity.

Wednesday, February 20, 2013

Here, There, and a Chair

Well as Spring approaches... fingers crossed, life seems to be making a more than impressive effort to butt into my quilting time.  Things like a WHOLE week off school for my 6 and 7 year old, who of which when locked inside a 800 square foot house can't help but be most annoyingly in my way... err, I mean preciously underfoot (smack self in head).  Although I'm not much helping the situation by taking over the kitchen... the entire kitchen, floor.  With the all important step of basting my quilt.  Unfortunately this is also the only route to the bathroom. 
On another note my eldest daughter lost a tube out of one of her ears and has unexplained hearing loss in her 'good' ear.  So off we go spending a ton of time,effort, and money traveling to and from Saskatoon for specialist appointments.  But luckily we go for surgery next week.  It's a small price to pay for a problem that honestly is not the end of the world, and I'm thankful for my children being  healthy (doesn't mean I can't make light of the situation and let you know how much I enjoy grumpy kids who are always `starving` and have to pee constantly, on a snow filled road trip... Through scenery central).  

There is a bright side to travel.  Any quilter who lives in a small town can appreciate the ensuing bribery that allows for a 'quick' stop into a couple fabric meccas!  

Anyhow obviously I have been working on my Astrology Quilt, there are 12 squares and using trapunto in the center of every square is a symbol of each of the Zodiac signs... I suppose I should call it a Zodiac Quilt eh?  Anyhow I followed the method presented by Leah Day (click here), using water soluble thread around a marked outline, and clipping away excess batting.  Leaving myself with this...  
 In hindsight I should have used a better quality/loft batting, but since I'm testing the technique for a  future project I'm happy with what I've got.  I really love machine quilting, and I believe I'm getting better at it (honestly there is just no getting worse at a skill like this).  But I'm afraid I'm stuck in old basting habits.  I know that pin-mors are all the rage but I find I'm always bundling up my quilts for one reason or another and I'm pretty well invested in safety pins at this point.  I'm sure I will go over to the other side one day, but not today.  My favorite tool for such an intense job as basting is obviously this little do-hickey.
The Do-Hickey
The Alternate Do-Hickey when the first one goes missing


Here is a photo of the water soluble thread (white with the permanent stitching on top (well almost on top :).  You just can't use trapunto on a quilt without some pebbling... right. Plus it seems to be one of those elite quilting designs that both looks and actually is difficult to achieve.  So, presenting my first attempt at pebbles... filling the complete center of each square, around the little swirls, in every nook and cranny... COMING OUT MY WAZOO! I'm pretty good a pebbles now. 


Anyhow the quilt isn't done, because other things have been coming up (as previously mentioned  I'm actually surprised I got this post done).  One of those lovely things was my visiting In-Laws.  I'm doing many quilty things in preparation of tackling a fairly ambitious project I have planned for my In-Laws, but nothing compared to what my Mother-In-Law has done for me.  

This chair is something that I claimed from my grandparents house, many years ago when they got new furniture.  This chair has been very special to me not only because it belonged to my grandparents who have taught me so many things (including love, adventure, youth, and a sense of self worth), but also because this is where I used to hide my beer and write depressing poetry in my youth.   My Mother-In-Law refinished this chair with her own two hands.  Discovering during that process the history of the chair written on the frame.  

Purchased at auction by my great grandparents in approx 1945 (original filling horsehair, rags, batting), reupholstered by my grandmothers friends in 1983, and again in August 2012 for me by my Mother-In-Law.  I love you Sandy, thank you. 
Me in my chair... It`s going to look good in my studio
Linking up to share with the Needle and Thread Network.  I hope you enjoyed my little story.  Other things have been occupying my precious quilting time, like the construction of my studio.  If your interested to read more about that, go check out my renovation blog... it has it's moments, that seem to be snowballing into projects with no end.

Renovation 800


Tuesday, January 29, 2013

Astrology Quilt Top Tutorial

I have been designing quilts (on the down low) for the past month or two and needed a bit of a break so I made a cute quilt that I'm calling my Astrology Quilt due to the great focal fabric that has zodiac motifs on it.  So I wanted to do up 12 blocks and use my new parallelogram die that goes with my Accuquilt Go Baby.  I had never done 'Y' seams before but you never know until you try, so off I went.  Here is a photo of the quilt. 

My design wall isn't secured very well so the photo isn't as nice as it could be.

I had no idea how to built this block because most of the tutorials I found around the internet used half square triangles to build the parallelograms.  I don't think I built my block in a traditional way but I really am happy with the accuracy of the stars when all the blocks came together.  I used my Accuquilt Go Baby parallelogram die, but here are some cutting directions if you don't have the die/cutter. 


So there you have the written tutorial of this particular design.  If by chance you prefer video I have made my first quilting video and here it is.


I'm linking up to the Needle and Thread Network to share ideas and checkout the talented Canadian fiber artists out there.

Wednesday, January 9, 2013

Spider and Angle

Hat and toque combo for a little girl I know
First and foremost thank the gods it's back to school this week (I love my kids but I love my routine also).  My sewing nook (corner, cubby... half of the living room), has been sending me mixed messages these last couple weeks and I've found it hard to concentrate on any one thing.  That's not to say that I haven't been productive but I'm not quilting to my potential.  I'm feeling so constrained both by space and the all mighty dollar.  Sewing in the family living room is frustrating, considering it's also the only place for the kids to play, watch a movie, holds the one chair that my husband and I fight over, and is the computer room.  Winter started early so maybe it's just a little cabin fever, or the fact that I sing along to whatever Disney flick is playing in the background.  I could go into the whole money thing but I'm sure everyone knows all about that so I'll just leave it alone.   Life has been made all the more richer by our new family members... introducing the kittens.


On the left we have the high strung, 'cute as a button', what the hell was I thinking, Spider. And on the right the 'laid back unless he is awake' Angle (no that is not a spelling mistake, Angle like 90° ). My lovely children were lucky enough to receive said whirling devils (kittens) for Christmas from their insane mother, who thought there was (and I quote) 'more than enough room' (hence why my previous rant has now become both ironic and mute since I created my own hell). They steal, claw, rip, tear, jump, lick, and eat pretty much anything that is in my hand... Don't even get me started on the design wall, scrap box, or neatly stacked and organized block pieces. But like my children they are so dang cute I just have to smile and laugh and wait for the day my studio is done.
Awww... I totally get the pet photos now.

 But back to the quilting blog (while petting a cute kitten on my computer desk).  I put together a cute bag so I could practice free motion feathers as I'm planning them in a quilt for my mother-in-law.  I spent most of my Christmas holiday (some people call it that, I'm not sure I agree...) designing quilt after quilt trying to come up with something for my mother-in-law.  She is not picky, demanding, or overbearing.  She is the most wonderful mother-in-law anyone could ask for, but this causes me to panic a little bit.  When I made a quilt for my mom I just said "Give me the money, I'll make a quilt and it will be awesome."  Guess what,  it was awesome (Heron Quilt).  But I feel so much responsibility to make something original, genuine, and cool for my mother-in-law that I kept questioning my own aesthetic and over thinking it.  Anyhow long personal turmoil tale over, I finally just drew what she said to draw and I love it.

 So basically these feather shapes will be appliqued onto a cream whole cloth background and quilted with trapunto (fingers crossed) feathers and fancy things of that nature.  The colours are only to give you the idea of the type of colours she asked for, but they will obviously be a little (or a lot) different.  I'm working on collecting fabric but I see a couple of months work in my future.
Presently on the go at the moment I have my black and white wonky window quilt FINALLY put together with borders (which are not featured in the photo but I promise there is a border as she is all ready for the next step).  The next step will be to mark the quilt top because I'm going to learn trapunto on this quilt and apply those skills elsewhere (wink, wink).  I'll let you know how that goes but fortunately a lady I have taken some very good advice from (you may have heard of her), Leah Day, just posted a video (here) not so long ago about her process, so I'm sure I can figure it out too.  On my design wall now I have this beauty of a block that I have been promising myself I would tackle forever now. I'm planning on doing a tutorial on this block if anyone is interested and depending on how smoothly the stars go together.


So more scatter brain sent me down a fleecy path this past while.  My husband was complaining that the kids kept stealing his toques, which is true.  When Vanessa (Crafty Gemini) posted a video and pattern for these cute little toques I got right to work and started into my bin of scrap fleece.  Pictured are my toothless wonder and Payton (I added some lace for a little umph).  I made a couple for my niece and nephew (once removed) and sent them off via Canada Post where I paid $10 a package!

My little poser
Speaking of package, my good friend Chris over at Passion Quilting and I decided on an exchange since our quilting aesthetic are opposite.  I received my package and am planning, planning, planning.  Thanks Chris, and thank you Gwen for the cute little traveling dress.  I'm linking up to The Needle and Thread Network because everyone over there rocks.  Check out some Canadian fiber art blogs.