 |
| the big one |
 |
| template, note to self; use more dash mark things |
Step One: Sketch and transfer to freezer paper.
One really important thing I learned was to have a reference sketch especially when I started having more than ten pieces, it's hard to remember where all those little bits go. I will also make a point to have more of those little dashes to help place the pieces more accurately. Also I will mark the top of the piece with little arrows or something along those lines, so I know which way is up and what edge to fold over for the seam.
 |
| before I ironed the TOP edges under |
The seam allowance allows you to fold the raw edge under the freezer paper, I learned that it is only necessary to fold the top edge of the fabric under. When your placing your pieces together later layer from the top down.
I used a large iron to iron my first prototype, and it worked just fine for the moment, but I did 'invest' in one of those little ones, I think it was a good purchase. I obviously plan on doing one more quilt like this so why not buy more stuff to move to Saskatchewan in 6 weeks? But honestly I really like the little iron, and it really made a difference in the amount of swearing I was doing.
The other and possibly most important tool here was starch. I bought the aerosol spray stuff (I bought it at a regular drug store), sprayed it into a small dish and applied it to the edge with a kids old paint brush.
Also remember to snip the edges of the concave curves to achieve that flawless edge.
 |
| all the bits are lined up and ready to iron down |
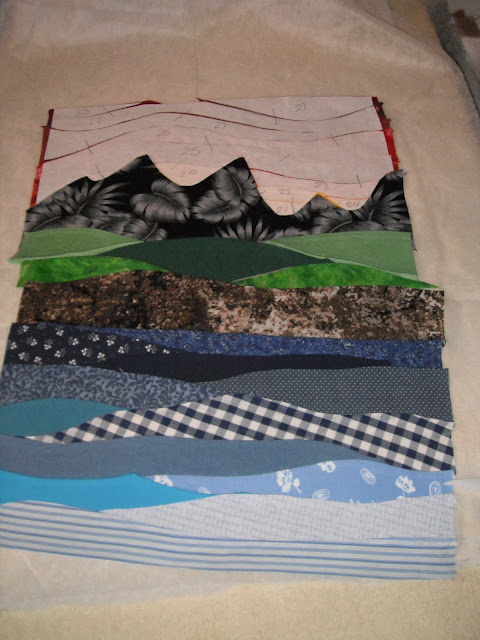
Step Three: Arrange bits into their correct spots lining up the little dash marks. Iron them paper up onto a piece of one sided stabilizer.
Once I had all the individual pieces prepped I lined them up face up on a piece of stabilizer stuff. I used the stuff that people put in shirt collars, it's important that you use something that is not going to make a quilt too stiff and has only one side of adhesive. Once lined up I ironed the whole thing and am ready to pull off the paper. I need to take more time and line up those ever important dash lines.
Step Four: Remove Paper!
 |
| water |
 |
| land |
 |
| sky |
Step Five: Using invisible thread stitch down all the seams.
Much easier said than done eh! I was a little horrified how many seams there were and how much you would see my back stitch if I had to stop half way across the quilt (why do I never think of these things before I run along and do it)? Anyhow here is a little photo of what the back looked like after stitching it all down.
Step Six: Baste quilt and quilt it!
The top looks just fine and a lot better after I started quilting it. Here is a photo of how far I have gotten with the quilting so far, I'm not sure if I will ever finish this little quilt I just wanted to test an idea and try some thread painting (the grass at the edge of the water). I feel I have learned what I wanted and now I can move on. I'm sorry for the lack of really informative photos, I never did plan to post this but I was just so happy to figure out a great way to tackle this ginormous project I had to share. But I have decided that after I move to Saskatchewan in June I will tackle 'The Big One' and I will take tones of photos and share a more in depth 'how it's made' with everyone. Whew I feel as though I'm turning up the heat and I'm only semi prepared for it but I suppose you never succeed until you try. I suppose one could say it's never finished until it's done too... hmmm maybe I should finish this...


I like it! Can't wait to see the big one!
ReplyDeleteThanks for sharing your process. Your background looks great. Good luck with the Heron.
ReplyDeleteIt looks gorgeous! Are you still going to add the crane? I think it would look great appliqued on top of what you have. What an artist you are!
ReplyDeleteI can't wait to see the finished quilt! It looks great so far! Good luck with the rest!
ReplyDeleteWOW thanks for sharing.
ReplyDeletevery nice..totally different...have you added your blog to the directory?
ReplyDeletewow! This is quite a project! You are very brave and very creative!
ReplyDeleteAmazing! You are off to a great start.
ReplyDeleteIt looks great , I love the use of fabrics !
ReplyDeleteFabulous...I love the fabrics that you used...keep on going:)
ReplyDeleteInteresting process;thanks for sharing! I love the colors and the depiction of the mountains.
ReplyDelete